

Baking bread yourself is very easy. It's done almost on the side. It is a joy to do something creative. And it's a lot easier than most people think. The result is healthy and very tasty on top of that. For me it has developed into a real hobby.
Here I will show you how you can easily enjoy delicious home-baked bread yourself. It is really easy. Try it out and you will experience it! I will give you my favorite recipe and explain to you what is important.
For those in a hurry: You can skip the introductory paragraphs and go to the recipe and action below.
If you are in less of a hurry, you should read this article in its entirety, as it contains some useful information for your health in addition to the delicious bread recipe.
Not all bread is the same
Part of the motivation to bake bread yourself comes from the desire to make it yourself and the great and nutritious pleasure experience that follows.
On the other hand, there are various solid reasons why you should bake bread yourself. Therefore, before the recipe and the way to your own baking experience, I will give you a few more information on why home-baked bread is healthier than bread from mass-produced or industrial bakeries.
Below you will find the recipe for my absolute favorite bread and a few useful baking tips for success.
To make one thing clear right away: The products of handicraft bakers and bakeries are generally also high-quality products that are worth their price. Unfortunately, there are only a few bakers left who produce their baked goods in the traditional way. Unfortunately, consumers buy “cheap” far too often and without reflection: baked goods from discounters and cheap bakers. None of these are traditionally made baked goods, but highly industrially processed foods that lack much of what constitutes a healthy food.
On the contrary: In the EU, several hundred additives are allowed in baked goods, especially in bread. This means that it is permitted if there is a whole conglomerate of substances in many industrial baked goods, a whole chemical cocktail, so to speak.
One of the main differences between artisanal bread and industrial bread is the means used to raise the dough. Of course you are thinking of yeast, of course. Yeast just needs its time. In industry, where everything has to be done efficiently and quickly in order to earn as much money as possible with as little effort as possible, leavening agents and much more are also used, ultimately additional chemicals, in order to produce results faster and more efficiently. The quality inevitably falls by the wayside. Yes, it cannot arise in the first place. It's about quantity rather than quality. The price counts. Not the quality.
So if you don't bake yourself, buy your baked goods from a traditional artisan baker near you. As long as it still exists. There you get quality and class instead of boring mass.
A word briefly on the subject of wheat
Now you are on the way to producing and enjoying quality. I don't want to stop you long and stand in the way of your creativity when baking bread, but you should forego wheat!
Wheat is the grain from which almost everything that can be bought is baked. Just because it is used in almost all baked goods does not mean that it is healthy. Unfortunately the opposite is the case! A high double-digit percentage of the population does not tolerate wheat, and many people even have a wheat allergy. Too often without knowing or noticing it. Many of the intolerance reactions take place inside the body (often invisible and unnoticed from the outside). Esp. the intestine is very often affected. And thus one of our most central organs that have a decisive influence on our health.
In short: Wheat makes you sick!
Tip: At the end of this article you will find further information on health-relevant aspects regarding wheat and other interesting information regarding the ingredients used from a bioenergetic point of view.
Since this article is not supposed to become a "wheat bashing" nor a treatise on why I urgently recommend you to completely and in any form (!) Forego wheat, I refer in particular to the extremely interesting and readable book Wheat bulb - why wheat makes you fat and sick of the American doctor Dr. med William Davis (also available in local bookshops, of course, to support the economy and tax-paying companies in your region).
Of course there are alternatives to wheat. Namely spelled. Spelled is a type of original wheat, i.e. a type of wheat that still has the original properties of wheat. Wheat that you can buy today can hardly be compared to the wheat that our ancestors used 50 years ago, for example. Wheat was bred to be a real high-performance grain. In this way, maximum yield is generated on a minimum area (and thus with the least possible effort).
Wheat, for example, has the property of responding very well to fertilization. In other words: the use of fertilizers (which can then also be detected in the grain itself) increases the wheat yield noticeably. Spelled, on the other hand, is far less “susceptible” to profit-increasing measures. The same amount of fertilizer, which causes significant increases in the yield of wheat, hardly produces any notable increases in yields with spelled.
Now you may understand why wheat has nothing to do with the wheat of our ancestors and why it is "unpopular" to grow spelled. You can simply make more money with wheat than with other grains, as it reacts very well to interventions that increase earnings. In contrast to spelled, for example.
"But if wheat is so unhealthy, why is it used so often despite all the circumstances?" You might ask yourself. The answer to this is (unfortunately) simple. It's about profit, not about the health of the masses of the population. As unfortunately in many other areas of our life. Or do you really believe that markets worth billions like the cell phone market would be restricted just because cell phone radiation poses an enormous cancer risk? (We will shortly go into more detail about the risk of electromagnetic radiation and other influences on our health in another article. We also adhere to this Lectures in which we explain the risks in detail and demonstrate the effects on the human biosystem).
Enough of the introductory words. Now I'll show you how you can create your own bread that only consists of the basic ingredients flour, water and yeast (as well as a few little things for the taste).
Here we go: How to bake your own bread
Baking bread is quick and easy. You will be thrilled when you can taste your baked goods afterwards. So, let's do it.
What do you need to get started?
- the right ingredients
- some helpful utensils
The ingredients for your bread
Of course, the quality of the ingredients determines the quality of the result. In order for you to produce something of high quality, you should use high quality ingredients as products in organic quality. But of course you can also buy conventional flour etc. from the supermarket. And of course you can also replace spelled with wheat that makes you sick (see above). As always and everywhere in life, you have a free choice.
All you need to bake bread weighing approx. 1 kg is:
- 1 kg of flour
- 1 cube of yeast (42 g)
- approx. 400 - 500 ml of water
- 2 tbsp salt
- 2 teaspoons of sugar and a little lukewarm water (to start the yeast)
- Bread spices to taste (e.g. anise, fennel, caraway, corriander)
You should have the following utensils and tools for baking:
- of course an oven
- Mixing bowl (or better a food processor with dough hook)
- Dough scraper
- round proofing basket and a baking stone for the oven or alternatively a loaf pan for bread weighing approx. 1 kg
Bread baking stone or loaf pan - the question of the system
No matter how you bake: both will work.
But: The bread that you bake on a baking stone will be visually and tastefully different from one that is baked in a classic bread pan. Bread baked on a brick is like bread from a stone oven. Quality and taste like in (great) grandma's time!
If you don't have a brick, it doesn't matter. Once you've baked bread a few times, you'll want to try something new. And then you will quickly get the idea to try a baking stone. I am convinced that you will rarely bake bread in a loaf pan once you have baked a really rustic bread on the stone
But now to my favorite bread.

My favorite recipe
For my absolute favorite bread (I like to call it "Rustic bread with King Ludwig Dunkel", you use the following ingredients:
- 580 grams of rye flour (1150)
- 420 gr spelled flour (1050)
- 1 cube of yeast (42 g)
- 1 bag of dry sourdough powder (rye or spelled sourdough)
- 1 bottle King Ludwig beer (dark) (0,5 ltr)
- 2 tbsp salt
- 2 teaspoons of fennel seeds
- 2 tsp anise seeds
- 2 teaspoons of sugar and a little lukewarm water (to start the yeast)
- optional: 1-2 tbsp barley malt (syrupy, makes the bread a little darker)
Tip: Use another, spicy, dark beer instead of König Ludwig Dunkel. For example, you could use Andechser Doppelbock dark. That’s also very tasty. In the end, however, the taste of the bread does not come from the beer used alone, but from the sum of the ingredients used.
Tip: You can also use this batter for bread rolls or flat rolls. If you have anything else Schabzigerklee (Also Sheep clover if you add it in powder form, the result will taste very similar to “Vinschgauer” (these are the delicious flat bread rolls from South Tyrol). But take max. 1 teaspoon sheep clover, because it is strongly aromatic and quickly affects the taste.
You can get all the ingredients in the organic market of your choice. You will also find these ingredients in organic quality in the "organic corner" of well-stocked supermarkets. In our experience, however, the products from Demter, Bioloand etc. are of higher quality than “non-name” organic products from the supermarket.
(For the quality of the ingredients and what you should pay attention to, as well as tips on how you can increase the quality of the ingredients a little, you can find the keyword "bioenergetic aspects" at the end of this article).
Basically: With flour you can of course also use lighter types of flour if you want to bake a "lighter" bread, i.e. a slightly less nutritious one, as the flour is more ground. (Remember: the smaller the number on the flour bag, the fewer parts of the whole grain there are; the higher the number, the more components there are). You can of course also bake everything with whole wheat flour. Then it is best if you grind the grain very fresh into flour (your own grain mill) or have it freshly ground in the health food store so that it comes into your bread as fresh as possible (without storage, etc.).
Kneading the dough
First, put all of the flour in the mixing bowl. In the middle you form a hollow with a tablespoon. Then you take the yeast, crumble it with your fingers, sprinkle the sugar over it and pour the lukewarm water over it (enough to cover all of the yeast well). Then you wait about 10-15 minutes. During this time the yeast begins to rise and small bubbles form, etc.
While you are waiting, you can place or place the beer bottle in warm water so that the beer is also warm. It doesn't need to be more than lukewarm, maximally lukewarm.
After the yeast has started and the beer has warmed up, you can start kneading.
First you put all the remaining ingredients (except the beer) in the mixing bowl, i.e. the sourdough powder, the salt and the bread spices.
The bread is baked with dark beer (König Ludwig Dunkel). The color of the beer alone does not produce a real dark tint of the bread, as one would expect with the dark beer. If you want to spice up your result visually, you can now add 1-2 tablespoons of barley malt (an extremely viscous, sticky and syrupy substance) to the bowl. (Incidentally, many bakers use this “trick” when they want to bake “wholegrain bread”, which many consumers expect to be brownish in color. This can also lead to the pretense of “wholegrain” where there is no wholegrain at all).
If you use a food processor, let it knead on the lowest setting for about 10 minutes. Right at the beginning you can pour half of the beer bottle into the bowl. While the dough gradually begins to develop, pour in more beer in small portions. In my experience, around 400 ml (i.e. 4/5 of the beer bottle) is enough to get the dough appropriately moist. If you have used a little too much beer or the dough seems too sticky, add another tablespoon of flour. (I am not concerned with the "scientific" accuracy of the quantities. In pragmatic terms, 1 cube of yeast can handle the dough even if you use two or three tablespoons more flour than the recipe allows).
If the dough is too dry, you take the last fifth of the beer and pour it in small portions into the bowl. But only as much as you really need to get a smooth dough.
As soon as the dough has been kneaded on the lowest level and has become a homogeneous mass, let it knead for about 7 minutes on level two of your food processor. Not faster! We don't want to "stress" the dough too much.
Kneading by hand is also possible. You proceed exactly as described above, only that you knead with your hand.
The only thing you have to be prepared for is that doughs made with rye flour are unpleasantly sticky 😉 So don't despair, but knead, knead, knead. If the dough is the right consistency and moisture, it will still stick, but it won't just stick to your fingers.
But don't worry: if you knead dough without rye flour, kneading by hand is much easier.
When your dough is ready, you can place it (or the mixing bowl with the dough in it) on a warm place to let it proof (e.g. on the underfloor heating, on the radiator or in another warm, possibly sunlit place). It is best to cover it with cling film so that it does not lose moisture.
And then you wait. Until the dough has about doubled. Your mixing bowl is then usually full.
Tip: Breads with rye dough not only stick more, in my experience they also rise worse than dough without rye.
The dough should rise for about 30-60 minutes (depending on the temperature). You don't need to do anything else during this time. Exercise patience. The yeast will do the rest. And wait for the dough to rise. With doughs made with rye flour, this can take a little longer.
The second kneading of the dough
When your dough has roughly doubled, the next round of kneading begins.
Before you get down to business, either prepare your proofing basket or your bread baking pan.
Put a few tablespoons of flour in the proofing basket and spread it with your fingers in the grooves of the basket so that it is completely covered with flour on the inside (the dough is then thrown from the basket onto the preheated brick. Of course, it should not be in the Proving baskets stick).
If you use a loaf pan, completely grease the inside with cooking oil or butter so that the bread does not stick to the walls after baking.
Once you have prepared everything, you can start:
For dough with rye flour, the following applies: If the dough is too sticky for you to knead by hand, you can knead it again for a few minutes on a low level with the food processor and from there fill it into the floured proofing basket.
Otherwise, it goes like this: You sprinkle your work surface extensively with flour and take the dough out of the bowl with the scraper (it is even easier with a dough card) and put it on the floured work surface. You flour your hands and knead the dough with your hands for a few minutes. He will develop some warmth again, which is also wanted.
In a professional way, one can differentiate between “rolling” the dough and “rolling” and so on. I'll spare myself the details. Even if you don't "roll the dough" like a real baker in this case, but knead it with your hands according to your taste, your bread will turn out to be a success (I started this way a few years ago for lack of better knowledge).
Tip: Actually, you shouldn't add any more flour to the dough now, as it can no longer be kneaded in as intensely as when kneading for the first time. But what if the dough is too moist and sticks to the palms and fingers all the time? Then, strictly speaking, that's a dough mistake. But just gradually add some flour, spoon by spoon, knead and knead and the result will satisfy you!
When your dough is well kneaded, shape it into a ball shape and put it in the round proofing basket. You can then carefully press it into the shape so that it adapts better to the shape. Then sprinkle some flour on the dough and spread it with your fingers so that the cling film that you now cover over the proofing basket does not stick to the risen dough afterwards.
If you use a bread pan, you shape the dough into an elongated shape, give it the shape and, if necessary, you can push it into the mold a little, which doesn't have to be. Cover the loaf pan with a tea towel.
Now you put the bread back on a warm place and let it rise. This so-called "piece cooking" takes about 30-60 minutes (depending on the ambient temperature).
Tip: While the duration of walking after the first kneading does not have too great an impact on the quality of the bread, you should keep an eye on it now so that it does not go too long.
You can preheat the oven while you wait. If you are using a bread stone, you should preheat it to 30 ° C for about 240 minutes so that the baking stone gets really hot and is heated through and through.
In the case of the loaf pan, 220 ° C is usually sufficient to start with and heating is faster because only the oven should reach this temperature.
When the bread fills the basket or the mold well (or the dough has doubled its volume), baking actually starts.
Baking your bread
It's finally starting!
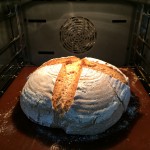
First, remove the cling film or the cloth that you used to cover the bread that was going to go. Then open the oven, pull out the baking stone and throw the bread from the proofing basket onto the stone. Using a sharp knife, cut the dough crosswise from above, about 1-1,5 cm deep. Now make four small cuts (about 1 cm deep) diagonally. Then you push the stone and bread back into the oven and leave it Caking. For about 15 minutes at 240 ° C. During this time, the bread will gradually rise to its final size.
When the first quarter of an hour has passed, reduce the temperature to 200 ° C and briefly open the oven to let out the moisture. Then you finish baking the bread at this temperature. It takes 30 minutes. Then you take your baked work out of the oven and place it on a rack to cool down.
If you use the loaf pan, you push it into the oven, make a lengthwise cut about 1-1,5 cm deep into the dough with a sharp knife and bake it. Here, too, the bread rises to its final size within the first quarter of an hour. After about 40-45 minutes it will be ready and you can pull the pan out of the oven.
Now you should take it out of the mold for a short time so that it can dry and cool down (since the bread was baked in a box that was only open at the top, it is more humid after baking than if it had been baked "naked" on the stone oven If you can get it out of the mold, you can, for example, carefully move a thin scraper between the bread and the mold, and then turn the bread onto a wire rack.
Tip: When is your bread done? Knock on it and you will hear it! When free-form baking on the bread stone, it hardly sounds hollow when you knock on it at the end of the baking time. In terms of shape, however, it sounds much more hollow. Trust in your feelings, bake for 5 minutes if necessary. The bread will still sound hollow in the baking pan (even if it is cooked).
Tip: Do you want to bake your bread a little more crispy? Then open the oven door for the last 10 minutes of baking. This makes the crust nice and crispy, as the expert says, so particularly crispy.
(This tip only applies to the brick).
Tip: Your bread will have a slightly thinner (and still wonderfully crispy) crust if you bake with steam in the 15-minute baking phase. (If your oven does not have a steam function (by the way, ours does not have this luxury either), you can simply put an oven-compatible container filled with a maximum of half water in the oven or insert the drip pan of your oven at the bottom and fill up a glass of water) .
By baking with steam, your bread gets more moisture at the beginning, the crust becomes finer, etc.
After baking, remove the container and leave the oven open for a few moments so that the steam can pull away. (Don't forget to reduce the temperature. See above).
NOTICE: Be careful when filling in the water and when opening the oven at the end of the baking process! Risk of scalding from hot steam!
(This tip only applies to the brick).
You can easily vary the recipes and create your own creations with them. Here are a few ideas in brief:
- Replace 50 g of flour with the same amount of unground amaranth (small grain balls). This has a very interesting effect: it makes the bread very crispy. Try it best in breads without rye flour. It's a fantastic trick.
- Replace up to 70 or 80 g of flour with linseed and / or chia seeds. Delicious!
- Bake raisin bread (no rye flour, only spelled, plus 300 gr. Raisins and two instead of one cube of yeast, plus about 1-1,5 tbsp sugar in the dough. The result is below. Looks delicious, doesn't it?

Healthy bread is easy, quick and inexpensive to make
 Baking bread yourself is very easy. It's done almost on the side. It is a joy to do something creative. And it's a lot easier than most people think. The result is healthy and very tasty on top of that. For me it has developed into a real hobby.
Here I will show you how you can easily enjoy delicious home-baked bread yourself. It is really easy. Try it out and you will experience it! I will give you my favorite recipe and explain to you what is important.
For those in a hurry: You can skip the introductory paragraphs and go to the recipe and action below.
If you are in less of a hurry, you should read this article in its entirety, as it contains some useful information for your health in addition to the delicious bread recipe.
Not all bread is the same
Part of the motivation to bake bread yourself comes from the desire to make it yourself and the great and nutritious pleasure experience that follows.
On the other hand, there are various solid reasons why you should bake bread yourself. Therefore, before the recipe and the way to your own baking experience, I will give you a few more information on why home-baked bread is healthier than bread from mass-produced or industrial bakeries.
Below you will find the recipe for my absolute favorite bread and a few useful baking tips for success.
To make one thing clear right away: The products of handicraft bakers and bakeries are generally also high-quality products that are worth their price. Unfortunately, there are only a few bakers left who produce their baked goods in the traditional way. Unfortunately, consumers buy “cheap” far too often and without reflection: baked goods from discounters and cheap bakers. None of these are traditionally made baked goods, but highly industrially processed foods that lack much of what constitutes a healthy food.
On the contrary: In the EU, several hundred additives are allowed in baked goods, especially in bread. This means that it is permitted if there is a whole conglomerate of substances in many industrial baked goods, a whole chemical cocktail, so to speak.
One of the main differences between artisanal bread and industrial bread is the means used to raise the dough. Of course you are thinking of yeast, of course. Yeast just needs its time. In industry, where everything has to be done efficiently and quickly in order to earn as much money as possible with as little effort as possible, leavening agents and much more are also used, ultimately additional chemicals, in order to produce results faster and more efficiently. The quality inevitably falls by the wayside. Yes, it cannot arise in the first place. It's about quantity rather than quality. The price counts. Not the quality.
So if you don't bake yourself, buy your baked goods from a traditional artisan baker near you. As long as it still exists. There you get quality and class instead of boring mass.
A word briefly on the subject of wheat
Now you are on the way to producing and enjoying quality. I don't want to stop you long and stand in the way of your creativity when baking bread, but you should forego wheat!
Wheat is the grain from which almost everything that can be bought is baked. Just because it is used in almost all baked goods does not mean that it is healthy. Unfortunately the opposite is the case! A high double-digit percentage of the population does not tolerate wheat, and many people even have a wheat allergy. Too often without knowing or noticing it. Many of the intolerance reactions take place inside the body (often invisible and unnoticed from the outside). Esp. the intestine is very often affected. And thus one of our most central organs that have a decisive influence on our health.
In short: Wheat makes you sick!
Tip: At the end of this article you will find further information on health-relevant aspects regarding wheat and other interesting information regarding the ingredients used from a bioenergetic point of view.
Since this article is not supposed to become a "wheat bashing" nor a treatise on why I urgently recommend you to completely and in any form (!) Forego wheat, I refer in particular to the extremely interesting and readable book Wheat bulb - why wheat makes you fat and sick of the American doctor Dr. med William Davis (also available in local bookshops, of course, to support the economy and tax-paying companies in your region).
Of course there are alternatives to wheat. Namely spelled. Spelled is a type of original wheat, i.e. a type of wheat that still has the original properties of wheat. Wheat that you can buy today can hardly be compared to the wheat that our ancestors used 50 years ago, for example. Wheat was bred to be a real high-performance grain. In this way, maximum yield is generated on a minimum area (and thus with the least possible effort).
Wheat, for example, has the property of responding very well to fertilization. In other words: the use of fertilizers (which can then also be detected in the grain itself) increases the wheat yield noticeably. Spelled, on the other hand, is far less “susceptible” to profit-increasing measures. The same amount of fertilizer, which causes significant increases in the yield of wheat, hardly produces any notable increases in yields with spelled.
Now you may understand why wheat has nothing to do with the wheat of our ancestors and why it is "unpopular" to grow spelled. You can simply make more money with wheat than with other grains, as it reacts very well to interventions that increase earnings. In contrast to spelled, for example.
"But if wheat is so unhealthy, why is it used so often despite all the circumstances?" You might ask yourself. The answer to this is (unfortunately) simple. It's about profit, not about the health of the masses of the population. As unfortunately in many other areas of our life. Or do you really believe that markets worth billions like the cell phone market would be restricted just because cell phone radiation poses an enormous cancer risk? (We will shortly go into more detail about the risk of electromagnetic radiation and other influences on our health in another article. We also adhere to this Lectures in which we explain the risks in detail and demonstrate the effects on the human biosystem).
Enough of the introductory words. Now I'll show you how you can create your own bread that only consists of the basic ingredients flour, water and yeast (as well as a few little things for the taste).
Here we go: How to bake your own bread
Baking bread is quick and easy. You will be thrilled when you can taste your baked goods afterwards. So, let's do it.
What do you need to get started?
- the right ingredients
- some helpful utensils
The ingredients for your bread
Of course, the quality of the ingredients determines the quality of the result. In order for you to produce something of high quality, you should use high quality ingredients as products in organic quality. But of course you can also buy conventional flour etc. from the supermarket. And of course you can also replace spelled with wheat that makes you sick (see above). As always and everywhere in life, you have a free choice.
All you need to bake bread weighing approx. 1 kg is:
- 1 kg of flour
- 1 cube of yeast (42 g)
- approx. 400 - 500 ml of water
- 2 tbsp salt
- 2 teaspoons of sugar and a little lukewarm water (to start the yeast)
- Bread spices to taste (e.g. anise, fennel, caraway, corriander)
You should have the following utensils and tools for baking:
- of course an oven
- Mixing bowl (or better a food processor with dough hook)
- Dough scraper
- round proofing basket and a baking stone for the oven or alternatively a loaf pan for bread weighing approx. 1 kg
Bread baking stone or loaf pan - the question of the system
No matter how you bake: both will work.
But: The bread that you bake on a baking stone will be visually and tastefully different from one that is baked in a classic bread pan. Bread baked on a brick is like bread from a stone oven. Quality and taste like in (great) grandma's time!
If you don't have a brick, it doesn't matter. Once you've baked bread a few times, you'll want to try something new. And then you will quickly get the idea to try a baking stone. I am convinced that you will rarely bake bread in a loaf pan once you have baked a really rustic bread on the stone
But now to my favorite bread.

My favorite bot: rustic bread baked with König Ludwig Dunkel
My favorite recipe
For my absolute favorite bread (I like to call it "Rustic bread with King Ludwig Dunkel", you use the following ingredients:
- 580 grams of rye flour (1150)
- 420 gr spelled flour (1050)
- 1 cube of yeast (42 g)
- 1 bag of dry sourdough powder (rye or spelled sourdough)
- 1 bottle King Ludwig beer (dark) (0,5 ltr)
- 2 tbsp salt
- 2 teaspoons of fennel seeds
- 2 tsp anise seeds
- 2 teaspoons of sugar and a little lukewarm water (to start the yeast)
- optional: 1-2 tbsp barley malt (syrupy, makes the bread a little darker)
Tip: Use another, spicy, dark beer instead of König Ludwig Dunkel. For example, you could use Andechser Doppelbock dark. That’s also very tasty. In the end, however, the taste of the bread does not come from the beer used alone, but from the sum of the ingredients used.
Tip: You can also use this batter for bread rolls or flat rolls. If you have anything else Schabzigerklee (Also Sheep clover if you add it in powder form, the result will taste very similar to “Vinschgauer” (these are the delicious flat bread rolls from South Tyrol). But take max. 1 teaspoon sheep clover, because it is strongly aromatic and quickly affects the taste.
You can get all the ingredients in the organic market of your choice. You will also find these ingredients in organic quality in the "organic corner" of well-stocked supermarkets. In our experience, however, the products from Demter, Bioloand etc. are of higher quality than “non-name” organic products from the supermarket.
(For the quality of the ingredients and what you should pay attention to, as well as tips on how you can increase the quality of the ingredients a little, you can find the keyword "bioenergetic aspects" at the end of this article).
Basically: With flour you can of course also use lighter types of flour if you want to bake a "lighter" bread, i.e. a slightly less nutritious one, as the flour is more ground. (Remember: the smaller the number on the flour bag, the fewer parts of the whole grain there are; the higher the number, the more components there are). You can of course also bake everything with whole wheat flour. Then it is best if you grind the grain very fresh into flour (your own grain mill) or have it freshly ground in the health food store so that it comes into your bread as fresh as possible (without storage, etc.).
Kneading the dough
First, put all of the flour in the mixing bowl. In the middle you form a hollow with a tablespoon. Then you take the yeast, crumble it with your fingers, sprinkle the sugar over it and pour the lukewarm water over it (enough to cover all of the yeast well). Then you wait about 10-15 minutes. During this time the yeast begins to rise and small bubbles form, etc.
While you are waiting, you can place or place the beer bottle in warm water so that the beer is also warm. It doesn't need to be more than lukewarm, maximally lukewarm.
After the yeast has started and the beer has warmed up, you can start kneading.
First you put all the remaining ingredients (except the beer) in the mixing bowl, i.e. the sourdough powder, the salt and the bread spices.
The bread is baked with dark beer (König Ludwig Dunkel). The color of the beer alone does not produce a real dark tint of the bread, as one would expect with the dark beer. If you want to spice up your result visually, you can now add 1-2 tablespoons of barley malt (an extremely viscous, sticky and syrupy substance) to the bowl. (Incidentally, many bakers use this “trick” when they want to bake “wholegrain bread”, which many consumers expect to be brownish in color. This can also lead to the pretense of “wholegrain” where there is no wholegrain at all).
If you use a food processor, let it knead on the lowest setting for about 10 minutes. Right at the beginning you can pour half of the beer bottle into the bowl. While the dough gradually begins to develop, pour in more beer in small portions. In my experience, around 400 ml (i.e. 4/5 of the beer bottle) is enough to get the dough appropriately moist. If you have used a little too much beer or the dough seems too sticky, add another tablespoon of flour. (I am not concerned with the "scientific" accuracy of the quantities. In pragmatic terms, 1 cube of yeast can handle the dough even if you use two or three tablespoons more flour than the recipe allows).
If the dough is too dry, you take the last fifth of the beer and pour it in small portions into the bowl. But only as much as you really need to get a smooth dough.
As soon as the dough has been kneaded on the lowest level and has become a homogeneous mass, let it knead for about 7 minutes on level two of your food processor. Not faster! We don't want to "stress" the dough too much.
Kneading by hand is also possible. You proceed exactly as described above, only that you knead with your hand.
The only thing you have to be prepared for is that doughs made with rye flour are unpleasantly sticky 😉 So don't despair, but knead, knead, knead. If the dough is the right consistency and moisture, it will still stick, but it won't just stick to your fingers.
But don't worry: if you knead dough without rye flour, kneading by hand is much easier.
When your dough is ready, you can place it (or the mixing bowl with the dough in it) on a warm place to let it proof (e.g. on the underfloor heating, on the radiator or in another warm, possibly sunlit place). It is best to cover it with cling film so that it does not lose moisture.
And then you wait. Until the dough has about doubled. Your mixing bowl is then usually full.
Tip: Breads with rye dough not only stick more, in my experience they also rise worse than dough without rye.
The dough should rise for about 30-60 minutes (depending on the temperature). You don't need to do anything else during this time. Exercise patience. The yeast will do the rest. And wait for the dough to rise. With doughs made with rye flour, this can take a little longer.
The second kneading of the dough
When your dough has roughly doubled, the next round of kneading begins.
Before you get down to business, either prepare your proofing basket or your bread baking pan.
Put a few tablespoons of flour in the proofing basket and spread it with your fingers in the grooves of the basket so that it is completely covered with flour on the inside (the dough is then thrown from the basket onto the preheated brick. Of course, it should not be in the Proving baskets stick).
If you use a loaf pan, completely grease the inside with cooking oil or butter so that the bread does not stick to the walls after baking.
Once you have prepared everything, you can start:
For dough with rye flour, the following applies: If the dough is too sticky for you to knead by hand, you can knead it again for a few minutes on a low level with the food processor and from there fill it into the floured proofing basket.
Otherwise, it goes like this: You sprinkle your work surface extensively with flour and take the dough out of the bowl with the scraper (it is even easier with a dough card) and put it on the floured work surface. You flour your hands and knead the dough with your hands for a few minutes. He will develop some warmth again, which is also wanted.
In a professional way, one can differentiate between “rolling” the dough and “rolling” and so on. I'll spare myself the details. Even if you don't "roll the dough" like a real baker in this case, but knead it with your hands according to your taste, your bread will turn out to be a success (I started this way a few years ago for lack of better knowledge).
Tip: Actually, you shouldn't add any more flour to the dough now, as it can no longer be kneaded in as intensely as when kneading for the first time. But what if the dough is too moist and sticks to the palms and fingers all the time? Then, strictly speaking, that's a dough mistake. But just gradually add some flour, spoon by spoon, knead and knead and the result will satisfy you!
When your dough is well kneaded, shape it into a ball shape and put it in the round proofing basket. You can then carefully press it into the shape so that it adapts better to the shape. Then sprinkle some flour on the dough and spread it with your fingers so that the cling film that you now cover over the proofing basket does not stick to the risen dough afterwards.
If you use a bread pan, you shape the dough into an elongated shape, give it the shape and, if necessary, you can push it into the mold a little, which doesn't have to be. Cover the loaf pan with a tea towel.
Now you put the bread back on a warm place and let it rise. This so-called "piece cooking" takes about 30-60 minutes (depending on the ambient temperature).
Tip: While the duration of walking after the first kneading does not have too great an impact on the quality of the bread, you should keep an eye on it now so that it does not go too long.
You can preheat the oven while you wait. If you are using a bread stone, you should preheat it to 30 ° C for about 240 minutes so that the baking stone gets really hot and is heated through and through.
In the case of the loaf pan, 220 ° C is usually sufficient to start with and heating is faster because only the oven should reach this temperature.
When the bread fills the basket or the mold well (or the dough has doubled its volume), baking actually starts.
Baking your bread
It's finally starting!
First, remove the cling film or the cloth that you used to cover the bread that was going to go. Then open the oven, pull out the baking stone and throw the bread from the proofing basket onto the stone. Using a sharp knife, cut the dough crosswise from above, about 1-1,5 cm deep. Now make four small cuts (about 1 cm deep) diagonally. Then you push the stone and bread back into the oven and leave it Caking. For about 15 minutes at 240 ° C. During this time, the bread will gradually rise to its final size.
When the first quarter of an hour has passed, reduce the temperature to 200 ° C and briefly open the oven to let out the moisture. Then you finish baking the bread at this temperature. It takes 30 minutes. Then you take your baked work out of the oven and place it on a rack to cool down.
If you use the loaf pan, you push it into the oven, make a lengthwise cut about 1-1,5 cm deep into the dough with a sharp knife and bake it. Here, too, the bread rises to its final size within the first quarter of an hour. After about 40-45 minutes it will be ready and you can pull the pan out of the oven.
Now you should take it out of the mold for a short time so that it can dry and cool down (since the bread was baked in a box that was only open at the top, it is more humid after baking than if it had been baked "naked" on the stone oven If you can get it out of the mold, you can, for example, carefully move a thin scraper between the bread and the mold, and then turn the bread onto a wire rack.
Tip: When is your bread done? Knock on it and you will hear it! When free-form baking on the bread stone, it hardly sounds hollow when you knock on it at the end of the baking time. In terms of shape, however, it sounds much more hollow. Trust in your feelings, bake for 5 minutes if necessary. The bread will still sound hollow in the baking pan (even if it is cooked).
Tip: Do you want to bake your bread a little more crispy? Then open the oven door for the last 10 minutes of baking. This makes the crust nice and crispy, as the expert says, so particularly crispy.
(This tip only applies to the brick).
Tip: Your bread will have a slightly thinner (and still wonderfully crispy) crust if you bake with steam in the 15-minute baking phase. (If your oven does not have a steam function (by the way, ours does not have this luxury either), you can simply put an oven-compatible container filled with a maximum of half water in the oven or insert the drip pan of your oven at the bottom and fill up a glass of water) .
By baking with steam, your bread gets more moisture at the beginning, the crust becomes finer, etc.
After baking, remove the container and leave the oven open for a few moments so that the steam can pull away. (Don't forget to reduce the temperature. See above).
NOTICE: Be careful when filling in the water and when opening the oven at the end of the baking process! Risk of scalding from hot steam!
(This tip only applies to the brick).
You can easily vary the recipes and create your own creations with them. Here are a few ideas in brief:
- Replace 50 g of flour with the same amount of unground amaranth (small grain balls). This has a very interesting effect: it makes the bread very crispy. Try it best in breads without rye flour. It's a fantastic trick.
- Replace up to 70 or 80 g of flour with linseed and / or chia seeds. Delicious!
- Bake raisin bread (no rye flour, only spelled, plus 300 gr. Raisins and two instead of one cube of yeast, plus about 1-1,5 tbsp sugar in the dough. The result is below. Looks delicious, doesn't it?
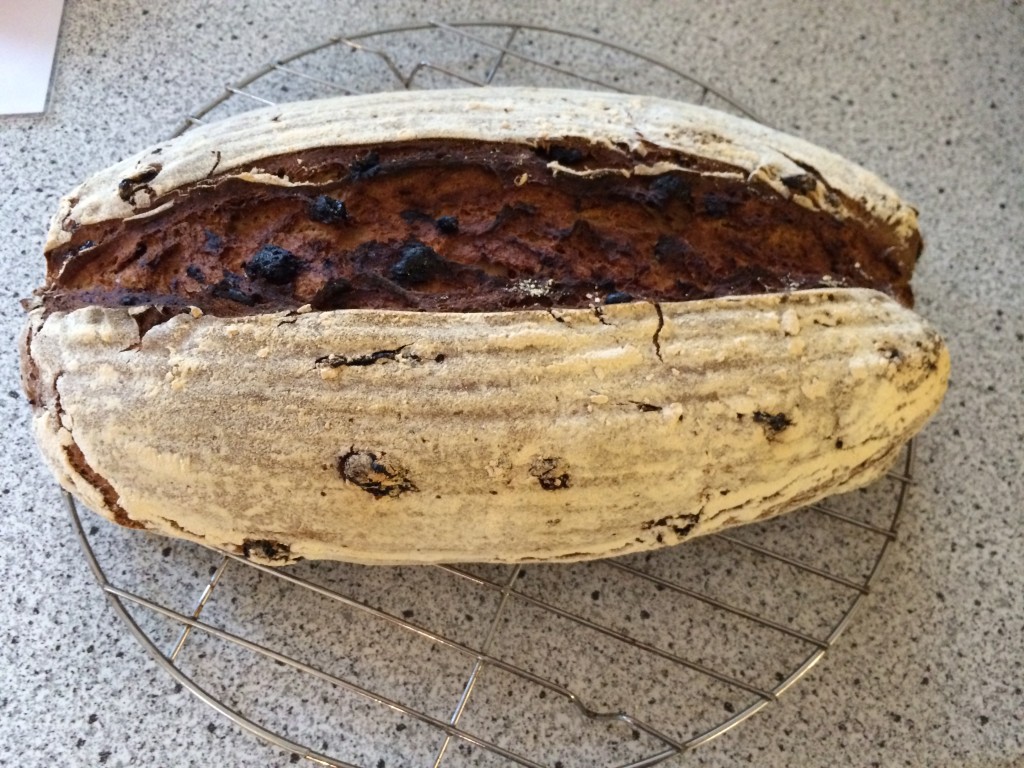
Delicious! Raisin bread baked on the baking stone. A bread like from the stone oven.
Notes and information from a bioenergetic point of view
Wheat
As already mentioned above on the subject of wheat, this grain is anything but a bringer of salvation.
You should avoid wheat for good reasons. Many people have an allergic reaction to wheat, which is often not immediately recognized.
In a bioenergetic way it is very easy to determine whether there is a wheat intolerance. Using a one-handed rod (often also called a tensor) it is easy to determine whether and how your own biological system responds to wheat. Other food intolerances can also be easily identified in this way.
Do you have any questions or would you like more information about working with the single rod? Then take here Contact us.
Note: From autumn 2016 we will be offering introductory courses in the practical use of the single-handed rod. You will get appointments and further information in good time here on our website.
The information and statements on the tolerability of foods such as wheat do not constitute a medical diagnosis, nor do they replace a medical clarification of the specific situation by a doctor or help practitioner.
Energetic quality of the food or ingredients used
The quality of the ingredients used (or of foods in general) does not only depend on their biological quality!
Organic products are good and valuable. But they are also subject to energetic effects such as barcodes and harmful vibrations etc.
In the past, we have already shown several ways how you can easily improve the quality of food in an energetic way. Read especially. this advanced article!
And now I wish you bon appétit while tasting your own bread!
Oh yes: If something doesn't work out, remember: No master has fallen from heaven! That something goes wrong is normal. Do not be discouraged, but try out and vary.
The more practice you have, the easier and safer you will produce delicious breads that many of your friends will be very enthusiastic about!
Source: http://www.matrixvital.com/2016/02/ein-gesundes-brot-ist-einfach-und-preiswert-erstellt/

##########################
If you like you can leave us a coffee for the effort and the time invested,
Thank you very much

As a precaution, the editors distance themselves from each article. The articles do not necessarily reflect the opinion of the editors, rather they only serve to free opinion. Nobody is perfect and error is possible. In addition: it is only information and does not necessarily have the attention of the editors.
As an Amazon partner, the blog operator earns qualified sales via the Amazon links inserted in the blog. Almost all of this earnings are converted into animal feed.
To comment on posts or to rate them with stars, you have to registered and logged in be. Not registered yet?

forest power

☘️ Kills all kinds of disease-causing germs through oxidation
☘️ Eliminates and drains heavy metals and environmental toxins
☘️ Increases performance...
"Chlorine dioxide is the most effective bacteria killer known to man."
Follow us on Telegram


, 12V generator with (AVR), generator, short circuit protection")


It's not healthy bread, just not as harmful as in the supermarket. Yeast is in the ingredients list. Only so-called thermophilic yeast can be bought on the market. What is that?
https://www.youtube.com/watch?v=dzL8kLXFgWw
http://de.altarta.com/04_13/gefahrlich-wenn-das-brot-das-wir-essen/
http://www.russische-heilgeheimnisse.com/heilgeheimnisse/hefe-appetitlich-ist-was-anderes/
Healthy bread is only possible without yeast. I hope they publish a recipe like that too.
Best regards
Kai
Hello, that's all. My wife has already created a vegan bread and vegan mozzarella and I've published the recipes. I am also happy to receive recipes.
"Mixing bowl (or better a food processor with dough hook)"
So for health it is energetically better
to knead the dough with hand, heart and love :).